Raspberry Pi Pico using MicroPython - Tutorial #3: ADC and PWM (with flex sensor)
The Raspberry Pi Pico is a new flexible microcontroller board from Raspberry Pi. It is a tiny, fast, and versatile board built using RP2040, a brand new microcontroller chip designed by Raspberry Pi.
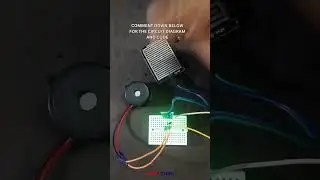
In this video, we go over ADC and PWM using micropython on the Pico. We take input from a potentiometer using ADC and control the brightness of an LED using PWM. A small demonstration with a flex sensor in a voltage divider circuit is also shown at the end.
Purchase your Pico now: https://robocraze.com/raspberry-pi-pi...
Pico micropython tutorial series playlist: • Raspberry Pi Pico using MicroPython
Tutorial #1 on LEDs and digital outputs: • Raspberry Pi Pico using MicroPython -...
Tutorial #2 on Buttons and interrupts: • Raspberry Pi Pico using MicroPython -...
Tutorial #4 on OLED display: • Raspberry Pi Pico using MicroPython -...
Tutorial #5.1 on making an Etch-a-Sketch with the pico (Part-1): • Raspberry Pi Pico using MicroPython -...
Tutorial #5.2 on making an Etch-a-Sketch with the pico (Part-2): • Raspberry Pi Pico using MicroPython -...
Raspberry Pi Pico Getting started page: https://www.raspberrypi.org/documenta...
Download Thonny IDE: https://thonny.org/
Chapters:
00:00 - Introduction
00:47 - Circuit Setup
01:47 - Introduction to ADC
03:17 - Introduction to PWM
05:51 - Controlling LED brightness with potentiometer
07:05 - Reading values from the flex sensor
12:30 - Outro
Смотрите видео Raspberry Pi Pico using MicroPython - Tutorial #3: ADC and PWM (with flex sensor) онлайн, длительностью часов минут секунд в хорошем качестве, которое загружено на канал Robocraze 05 Март 2021. Делитесь ссылкой на видео в социальных сетях, чтобы ваши подписчики и друзья так же посмотрели это видео. Данный видеоклип посмотрели 2,650 раз и оно понравилось 45 посетителям.