Raspberry Pi Pico using MicroPython - Tutorial #3: ADC and PWM (with flex sensor)
The Raspberry Pi Pico is a new flexible microcontroller board from Raspberry Pi. It is a tiny, fast, and versatile board built using RP2040, a brand new microcontroller chip designed by Raspberry Pi.
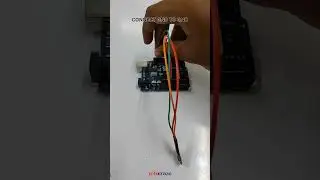
In this video, we go over ADC and PWM using micropython on the Pico. We take input from a potentiometer using ADC and control the brightness of an LED using PWM. A small demonstration with a flex sensor in a voltage divider circuit is also shown at the end.
Purchase your Pico now: https://robocraze.com/raspberry-pi-pi...
Pico micropython tutorial series playlist: • Raspberry Pi Pico using MicroPython
Tutorial #1 on LEDs and digital outputs: • Raspberry Pi Pico using MicroPython -...
Tutorial #2 on Buttons and interrupts: • Raspberry Pi Pico using MicroPython -...
Tutorial #4 on OLED display: • Raspberry Pi Pico using MicroPython -...
Tutorial #5.1 on making an Etch-a-Sketch with the pico (Part-1): • Raspberry Pi Pico using MicroPython -...
Tutorial #5.2 on making an Etch-a-Sketch with the pico (Part-2): • Raspberry Pi Pico using MicroPython -...
Raspberry Pi Pico Getting started page: https://www.raspberrypi.org/documenta...
Download Thonny IDE: https://thonny.org/
Chapters:
00:00 - Introduction
00:47 - Circuit Setup
01:47 - Introduction to ADC
03:17 - Introduction to PWM
05:51 - Controlling LED brightness with potentiometer
07:05 - Reading values from the flex sensor
12:30 - Outro
Watch video Raspberry Pi Pico using MicroPython - Tutorial #3: ADC and PWM (with flex sensor) online, duration hours minute second in high quality that is uploaded to the channel Robocraze 05 March 2021. Share the link to the video on social media so that your subscribers and friends will also watch this video. This video clip has been viewed 2,650 times and liked it 45 visitors.