Chest Freezer Mini Split Air Conditioner | Random Video Thursday's
This is not a build montage video or story of trial and error. But I show in the video that this final concept design works and explain it. It's a very simple setup and is easy to understand.
I avoided explaining my reasoning for doing this to save video time. But I will explain it here...I already had much of this set up from a previous project involving a geothermal test well in my basement. (PS - I only uploaded that video project to Facebook.) So I only needed to add a chest freezer and experiment with different build/design methods.
The reason I am not just using a window AC is because I prefer not to have intermittent loud noise at night. I prefer not to have any extra sunlight entering my room in very early morning hours. I also prefer to not hear the loud birds in the early morning either. I have sleeping issues and have had to overcome the triggers. I also have casement windows which makes it a little more difficult for using a window unit. On top of that, I already have a whole house AC and 3 vents in the bedroom with one booster. All of that is still not enough to keep my bedroom cool enough through the night during a hot summer. I usually leave my windows open during other times of the year at night when pollen, daylight and bird noises is not an issue but it really needs to be at least 20 degrees colder outside to have any effect on cooling the room. Also if the humidity is high outside then its not worth it either. And don't get me started on internal/floor A/C units.
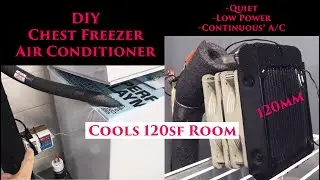
This system is quiet and only uses around 140 watts to run the freezer. The cooling part of the system is small so it fits on a night stand. So not only does it take up little space, it can blow right on you if you want. It's a nice quiet gentle cool breeze. So even if it didn't cool the whole room, it will cool you which is more efficient in my book. Also my original intention was to only use it at night. So during the day the freezer cools the water and then at night the freezer is off while only the pump/fan run to blow cool air all night. I actually had no idea at first that it could just run continuously until I optimized the setup. So it can be used either way. Which is excellent for power outages. If the power went out you can use this for around 12 hours on a very small battery or if you wanted to have the chest freezer on too it would only need a very small generator or something like a 50Ah battery/inverter. It's a lot more efficient when power is an issue because of its conservative power needs.
Here are the affiliate links for the parts:
12v 2x Noctua Fans - https://amzn.to/3NVot7z
Heat Exchanger - https://amzn.to/3rCKGQe
Check Valve - https://amzn.to/3K5gyU2
12v Pump - https://amzn.to/44tQr1v
Tubing - https://amzn.to/3XYMIGB
In-line Temperature Control Switch - https://amzn.to/3pMYsj0
For the tubing, you will need to heat up the end to slip it over the heat exchanger in/out ports. You can use boiling water, gentle flame or a heat gun. Use a little silicone grease or wd40 on the port then heat the tube and then use something like needle-nose pliers to widen the tube-end while its warm and then slip it over the heat exchanger nipple asap.
Смотрите видео Chest Freezer Mini Split Air Conditioner | Random Video Thursday's онлайн, длительностью часов минут секунд в хорошем качестве, которое загружено на канал Growing Answers 20 Июль 2023. Делитесь ссылкой на видео в социальных сетях, чтобы ваши подписчики и друзья так же посмотрели это видео. Данный видеоклип посмотрели 3,437 раз и оно понравилось 59 посетителям.


![[KARAOKE/ENG] BTS - Yet To Come](https://images.reviewsvideo.ru/videos/xORt22uwsyc)