Remove Fence with 3 Simple Steps in Photoshop CC | Content Aware Fill | BAstudio
subscribe and support me.
Hello everyone.
In this video I going to show you.
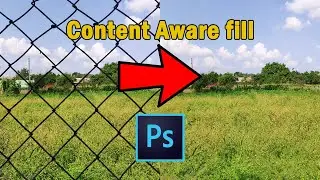
How to remove this fence, from any type of image, in 3 simple steps.
So lets get started.
If u want to download this image and follow along check the link in description.
==================
Download Link: https://unsplash.com/photos/quA6ePDs4Sw
==================
Open the image and duplicate it, then select the fence, you can use any type of selection tools, I going to use color range.
Because it's easy to select at this image. Deselect the unwanted area, I going to use quick selection tool.
You can see that quick selection tool didn't work good at this image.
So i use pen tool to deselect the area.
U can do it by selecting the area, and right click, select.
Make selection and select subtract from selection and click, OK. Do this for all the excess area.
I'll speed up this process.
After selection go to Select, Modify, and select Expand, give value as 2 or 3 pixels.
Then click ok.
Now press SHIFT + F5, to open up the fill panel and choose Content-Aware. And click Ok.
And allow photoshop to do its work.
Now u can see photoshop completed the work and it look's good.
Now it's our turn.
Use clone tool or spot healing tool to clean the excess area.
That's all we are all done in just 3 step.
Just recall what we did, Select, Expend, and fill with content-aware. That's all.
Done..
Ok see u in the next video...
Смотрите видео Remove Fence with 3 Simple Steps in Photoshop CC | Content Aware Fill | BAstudio онлайн, длительностью часов минут секунд в хорошем качестве, которое загружено на канал BA Studio 24 Июнь 2020. Делитесь ссылкой на видео в социальных сетях, чтобы ваши подписчики и друзья так же посмотрели это видео. Данный видеоклип посмотрели 62 раз и оно понравилось 10 посетителям.


![As You Fade Away - NEFFEX [Copyright-Free] | BA Studio](https://images.reviewsvideo.ru/videos/Ua-x2WFa2ys)