ESP8266/32 & PHP Server: Control LEDs with Database
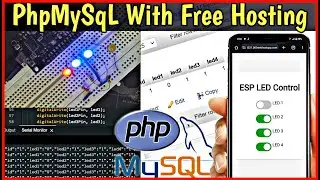
Welcome to our IoT project tutorial! In this video, we'll show you how to control LEDs using an ESP8266 or ESP32 board and a PHP MySQL server. This project is divided into two main modules:
Module 1: ESP8266/ESP32
Retrieve database data as a JSON object.
Update LEDs according to the database values.
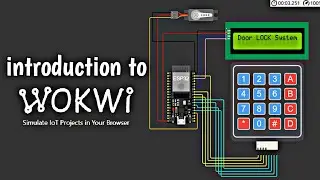
We'll walk you through the hardware setup, including the circuit diagram, and provide a detailed explanation of the code used to connect the ESP8266/ESP32 to a WiFi network, fetch data from a server, and control the LEDs based on that data.
----------
Module 2: PHP MySQL Server
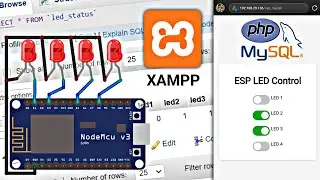
Set up a local server using XAMPP.
Create a database and a table to store LED statuses.
Write PHP scripts to retrieve and update data in the database.
Build a web interface with toggle switches to control the LED statuses.
----------
What's Inside:
Detailed hardware components list.
Step-by-step circuit diagram setup.
Comprehensive code walkthrough for ESP8266/ESP32.
Instructions for installing and configuring XAMPP.
PHP code explanations and integration with MySQL.
Creating a web interface to update database values.
-------
Demo and Testing:
We'll demonstrate how to integrate both modules and test the complete system. Watch the live demo to see the LEDs being controlled remotely via the web interface.
📢 Stay connected:
Instagram: / tfkio
Facebook: / tfkiot
Thank you for watching, and we'll see you in the next video!
🔗 *important link:*
Code:
https://github.com/tfkiot/esp32-8266_...
Previous Videos:
Background Music: • No Copyright Music Cyber Attack E...
Смотрите видео ESP8266/32 & PHP Server: Control LEDs with Database онлайн, длительностью часов минут секунд в хорошем качестве, которое загружено на канал TFK ioT 19 Июнь 2024. Делитесь ссылкой на видео в социальных сетях, чтобы ваши подписчики и друзья так же посмотрели это видео. Данный видеоклип посмотрели 1,236 раз и оно понравилось 37 посетителям.