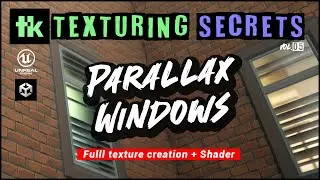
Making a Versatile Shader for Environment Art | Texturing Secrets #04
In this video, I break down how to create the versatile Architecture/Environment shader that I use for 95% of my environments. This efficient shader features a 2-layer heightmap blend and overlay, with toggles to make these features optional, and the shader as performance efficient as possible.
The workflow is the same in Unity and Unreal, with only a few nodes with slightly different names. I'm using Shadergraph, but the process will be pretty much the same in Amplify Shader.
Summary:
00:00 - Demonstration of the shader
10:40 - Creating a sub-graph
12:20 - HeightLERP code
17:50 - Shader Parameters
19:29 - Layer 1
20:16 - Roughness map multiply
21:04 - Layer 2
21:32 - Overlay
23:38 - Organizing node links
24:18 - Overlay order
25:48 - Overlay all layers
26:07 - Overlay UVs
28:50 - Blend parameters part 1
29:51 - Vertex colors/Transition
31:27 - Blend parameters part 2
31:44 - HeightLERP nodes
33:33 - Blend booleans
34:47 - Splitting ORM map
35:36 - Shader overview
36:53 - Environment Art Mastery Promo
🎥 Environment Art Mastery 🎥
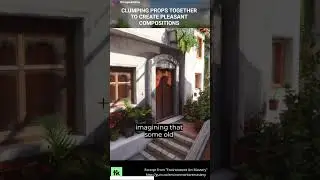
If you enjoy this content, make sure to check out my complete environment art course, where I show you how to create a full environment from the absolute beginning, including how to come up with your own ideas, block them out, and finalize to achieve the success you are seeking.
More information on: http://environmentartmastery.com/
👇Follow me on socials 👇
🐦 / thiagoklafke
🎨 https://www.artstation.com/thiagoklafke
📷 / thiago.klafke
Смотрите видео Making a Versatile Shader for Environment Art | Texturing Secrets #04 онлайн, длительностью часов минут секунд в хорошем качестве, которое загружено на канал Thiago Klafke 22 Январь 2024. Делитесь ссылкой на видео в социальных сетях, чтобы ваши подписчики и друзья так же посмотрели это видео. Данный видеоклип посмотрели 3,634 раз и оно понравилось 174 посетителям.


![NEO.Tokyo 21XX [Cyberpunk Unreal 5 Environment]](https://images.reviewsvideo.ru/videos/ykgN6P3AZoU)


![[SECRET VIDEO] TK SPN Door Garage 01 Timelapse (no audio)](https://images.reviewsvideo.ru/videos/0GoIkFnK2uo)