TP4056 Charging Module Everything You Need to Know About
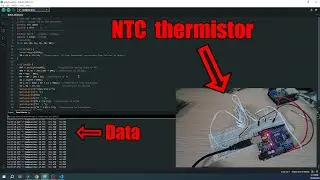
Hello everyone! In today's video, we delve into the TP4056 charging module, a crucial component for various projects. As you can see in the background, we have an array of components including an old camera, a DC-DC converter, and an ESP module. However, the spotlight is on the TP4056 charging module, which I'll be discussing extensively.
I'll be sharing my experiences with this module, covering everything from setup to troubleshooting. We'll focus on five key points: understanding the positive and negative terminals, connecting the charging port, linking batteries to the consumer, and the charging process itself.
After securing the module to the battery holder using double-sided tape, I employed soldering to connect the positive and negative wires. Using a multimeter, I selected the most charged battery for testing.
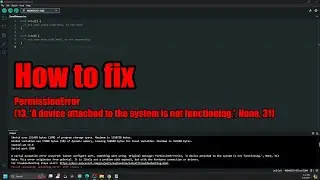
During testing, I encountered some issues with the charging indicator LEDs. Through troubleshooting, I resolved these issues and proceeded to test the charging duration, which I've documented with a clock for reference.
A quick recap: when the first LED blinks red and the second LED shows blue, your battery might not be connected well. Continuous red on the first LED indicates charging, while a blue second LED signals a fully charged battery.
If you're intrigued by future projects, be sure to subscribe for updates. And if you found this video helpful, don't forget to hit the like button. Thank you for watching, and I wish you a fantastic day ahead! See you soon!
Смотрите видео TP4056 Charging Module Everything You Need to Know About онлайн, длительностью часов минут секунд в хорошем качестве, которое загружено на канал Just Botond 31 Март 2024. Делитесь ссылкой на видео в социальных сетях, чтобы ваши подписчики и друзья так же посмотрели это видео. Данный видеоклип посмотрели 905 раз и оно понравилось 11 посетителям.