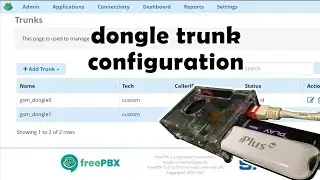
Configuring inbound & outbound GSM (chan_dongle) connections in FreePBX
In the previous video, I showed you how to install RasPBX on Raspberry Pi and turn it into a fully functional Freepbx-based GSM Gateway. Today we continue the series and we will add a custom dongle trunk, add inbound & outbound routes, and of course ..... test our setup.
Hardware: Rapberry Pi 4, Huawei E169, Huawei E173
Software: Raspberry Pi OS lite, Asterisk 16, chan_dongle
Website ► https://hotkey404.com/
This tutorial ► http://bit.ly/HOTKEY404_YT_qQa_jgoo3MQ
Also, check our new Asterisk monitoring software:
VOIPERO ► https://voipero.com
Enjoy the video and thanks for watching!
👍 If you found this tutorial helpful, please consider giving it a thumbs up and subscribing for more in-depth tutorials on VoIP and Raspberry!
🔔 Stay updated! Click the bell icon to receive notifications for new uploads.
📧 For business inquiries or questions, please contact [email protected].
🌐 Connect with me:
https://hotkey404.com/
/ hotkey404
/ hotkey404
👇 Have questions or need further assistance? Leave a comment below, and I'll do my best to help you out!
#freepbx #dongle #raspberry pi #gsm #asterisk #voipero
Watch video Configuring inbound & outbound GSM (chan_dongle) connections in FreePBX online, duration hours minute second in high quality that is uploaded to the channel HOTKEY404 24 April 2021. Share the link to the video on social media so that your subscribers and friends will also watch this video. This video clip has been viewed 26,014 times and liked it 404 visitors.


![FreePBX 16 on Debian 12 with Asterisk 18 [install from source guide]](https://images.reviewsvideo.ru/videos/LRghtpGsYTg)
![Install Asterisk 20 LTS on Debian 12 [Install from source Guide]](https://images.reviewsvideo.ru/videos/9jzWlJDkbwk)