☕ java jdbc with mysql in ubuntu example
1. Assuming that you already have MySQL installed.
2.install the connector driver.
sudo apt-get install libmysql-java
3. The next step is to make sure that the classpath is set. You can have this set automatically by adding this
a command to you bashrc file.
export CLASSPATH=$CLASSPATH:/usr/share/java/mysql-connector-java.jar
4. If you want to set this for all users, you should modify the /etc/environment instead.
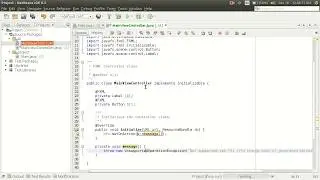
import java.sql.Connection;
import java.sql.DriverManager;
class JDBCTest {
private static final String url = "jdbc:mysql://localhost";
private static final String user = "username";
private static final String password = "password";
public static void main(String args[]) {
try {
Connection con = DriverManager.getConnection(url, user, password);
System.out.println("Success");
} catch (Exception e) {
e.printStackTrace();
}
}
} buy a coffee for me on this URL https://opensourcedevops.web.app or PayPal donation https://www.paypal.com/paypalme/OpenS...
Watch video ☕ java jdbc with mysql in ubuntu example online, duration hours minute second in high quality that is uploaded to the channel Open Source Devops 17 March 2017. Share the link to the video on social media so that your subscribers and friends will also watch this video. This video clip has been viewed 14,132 times and liked it 42 visitors.